Pedag T Form Metatarsal Supports
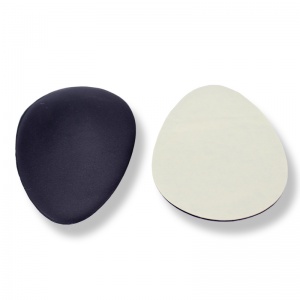
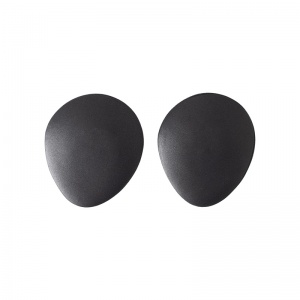
The Pedag T Form Metatarsal Supports are soft metatarsal pads for relieving the symptoms of splayfoot.
The Pedag T Form Metatarsal Supports are soft T-shaped pads that support the metatarsal bones to assure the anatomically correct position of the foot and relieve the latitudinal arch for added support and relief of any associated pain. The Pedag T Form Metatarsal Supports feature a self-adhesive underside and can be worn with any heel height.
What's Included?
- 1 x Pair of Metatarsal Supports
Features & Benefits of the Pedag T Form Metatarsal Supports
- T-shaped metatarsal pad, for targeted metatarsal support
- Alleviates symptoms of splayfoot
- Genuine leather for supreme comfort
- Self-adhesive, making them easy to use
Size Guide for the Pedag T Form Metatarsal Supports
The Pedag T Form Metatarsal Supports are available in 4 sizes. Please select your shoe size from the chart below:
| EU Size | UK Size | Length | Width |
| 35 - 37 | 2 - 4 | 82mm | 65mm |
| 38 - 40 | 5 - 7 | 90mm | 71mm |
| 41 - 43 | 7 - 9 | 96mm | 73mm |
| 44 - 46 | 10 - 12 | 99mm | 78mm |
Are the T Form Supports Suitable for Metatarsalgia?
The T Form supports are well suited to most types of metatarsalgia, however they might not be suitable for all types of metatarsalgia, depending on personal preference and the nature of your condition. If you would like an alternative to the T Form with a lower profile, we would recommend trying the Pedag Galant or Pedag Drop Metatarsal Supports instead.
Instructions for Use
The Pedag T Form Metatarsal Supports should be situated just behind the toe joints. To find the right position inside the shoe, remove your existing insole and position the T-Form. Please see the image below for an indication of the correct position.
Before sticking your support down, we recommend sticking it down with a piece of blue tack or tape and trying it out inside your shoes. This way, there is no danger of applying the support permanently in the wrong area.
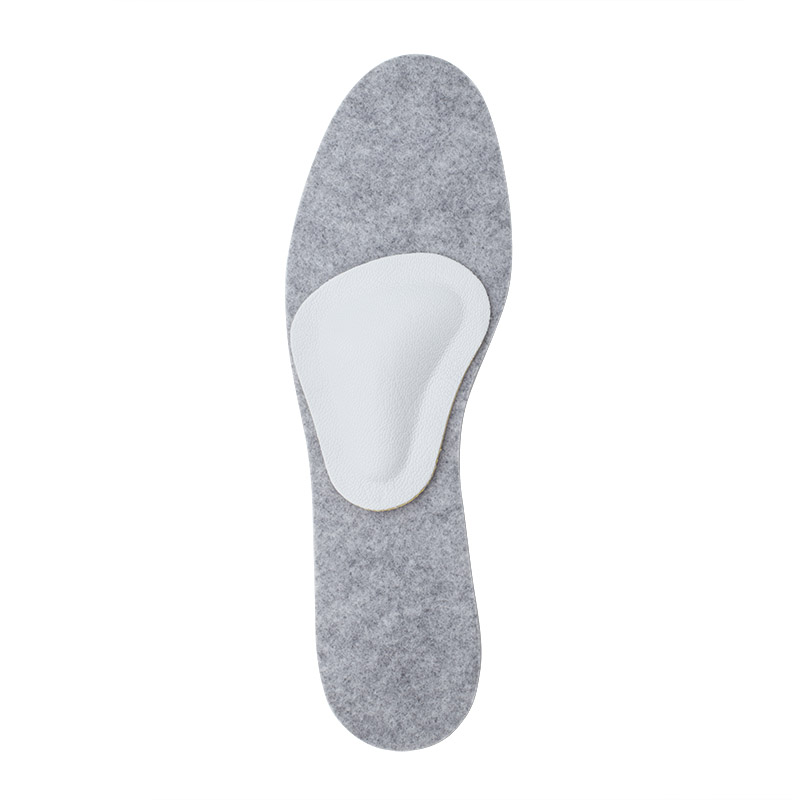
An indication of how the Pedag T-Form should be positioned
Then put the shoes on and walk around. If the pad does not feel comfortable, reposition it and try again. Once it feels comfortable, completely remove the release liner so that the pad securely adheres to your shoe (see the image below).
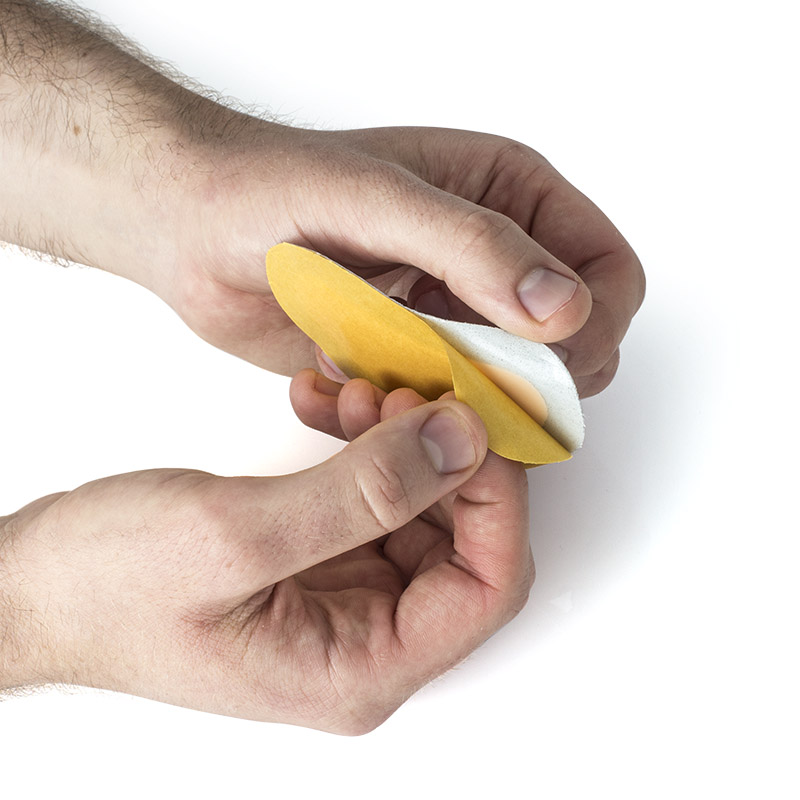
Remove the backing to affix your metatarsal pad securely
Once this step has been followed, the pad should be securely and comfortably fixed to your insoles, which can then be replaced in your shoe. If your shoe features non-removable insoles, please use the above method within your shoe.
UK Delivery Information & Fees
This item is normally dispatched by Royal Mail. The delivery expectation of this service is 1 to 3 working days.
When ordering before 2.00pm (Monday to Friday), your item will usually be dispatched the same working day.
We offer free delivery on all orders of £40.00 and over. On orders below £40.00, a £3.95 delivery charge is applied.
| Order Value | Delivery Fee | Delivery Timescale |
| Up to £39.99 | £3.95 | 1 to 3 working days |
| £40.00 and over | FREE | 1 to 3 working days |
Please see our specific delivery information page for more information. For up to the minute delivery information, please call our customer care team on 020 7501 1102 who will be happy to help.
Our Guide to Finding the Perfect Size and Fit
Using Your Shoe Size
For most of our insoles, the easiest way to find the best size for you is to go off of your current shoe size. The majority of our insoles are available in a range of sizes and you can simply select the size that best fits your existing shoes.
Please be aware that, as with shoes, there can be slight variations in the size of insoles. For example a size 8 of one brand might not be exactly the same size and width as the size 8 of another. To help account for these discrepancies, a number of our insoles include dimensions to help you ensure you're getting the right size.
Measuring Your Current Insoles
While using your shoe size to find your best size is a good guide, it is not always foolproof. If you want to guarantee that your insole fit your shoes as closely as possible, we recommend measuring your existing insole and using this as a guide to your size.
To do this, please follow the steps outlined below:
- Remove the existing insole from the shoes you wish to use your new insoles with (please note that not all insoles are removable)
- Measure the insoles at their longest and widest points (see the below diagram for an idea of where this will be
- Match the measurements to the dimensions of the insoles listed, and choose the size that best fits your results
.jpg)

Where Can I Find the Dimensions?
The dimensions for insoles can be found on the "Product Details" tab (please see below) and are usually found in the sizing section of the listing, in a table. Please be aware that not all products currently have the dimensions listed.

The dimensions of insoles can usually be found on the "Product Details" tab
What If There Are No Dimensions Listed?
If you do not see the dimensions listed on the Product Details tab, please fill in the form below and we will work to get the relevant information as quickly as possible. We will email you once we have the information that you have requested.
Trimming Your Insoles to Fit
To get the ultimate level of fit from your insoles, you can trim them to make a small adjustment. To trim your insoles, simply follow the steps below:
- Remove your existing insoles from your shoes
- Line up your existing and new insoles at the heel
- Trace the outline of the insoles against the new pair at the toe end (see the image below for an example)
- Carefully cut along the traced line
- Your insoles should now fit your shoes better

Carefully trace the outline of your insole
Please note that not all insoles are suitable for trimming. Most insoles are unsuitable for return once they have been trimmed to fit; we recommend bearing this in mind prior to trimming.
If you would like a more detailed guide to trimming your insoles, please read our full guide on How to Trim Your Insoles.


.jpg)
.jpg)
.jpg)
.jpg)
.jpg)
.jpg)
.jpg)
.jpg)
.jpg)
.jpg)
.jpg)
.jpg)
(1).jpg)
(2).jpg)
(3).jpg)
(4).jpg)
(5).jpg)
.jpg)