Phase 2 Multi Podus Pressure Relief AFO
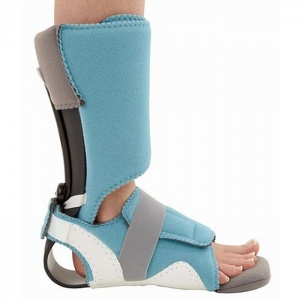
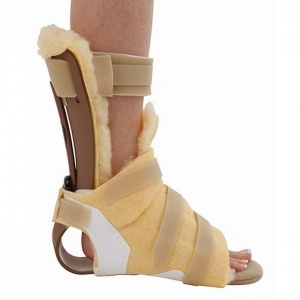
The Phase 2 Multi Podus Pressure Relief AFO provides controlled static stretch for the correction of plantar flexion contractures.
Who Can Benefit From The Phase 2 Multi Podus Pressure Relief AFO?
The Phase 2 Multi Podus Pressure Relief AFO is suitable for:
- Drop foot or severe contracture
- Stroke or brain injury patients
- Achilles rupture
- Cerebral Palsy
- Prolonged bed rest
- Static progressive ankle positioning
The Phase 2 Multi Podus Pressure Relief AFO offers adjustable positioning from 40° plantar flexion to 10° dorsiflexion in infinite increments to support foot drop in a detailed and customised way. It is a cost effective alternative to serial casting, it is removable for daily range of motion therapy and skin hygiene.
Features and Benefits of the Phase 2 Multi Podus Pressure Relief AFO
The Phase 2 Multi Podus Pressure Relief AFO eliminates pressure or friction on the heel, which helps to reduce the risk of pressure ulcers developing. It helps to stimulate healing by enhancing blood circulation and reduces recovery time.
The canvas reinforced anklet which can accommodate mild to moderate muscle tone with resulting spasticity, and the rotator bar controls hip and leg rotation to provide functional alignment.
Sizing for the Phase 2 Multi Podus Pressure Relief AFO
The Phase 2 Multi-Podus is available in 4 sizes, please see the table below for details.
| Description | Foot Length (cm) | Max Calf Circ (cm) |
| Small | 17.8 - 20.3cm | 40.6cm |
| Medium | 20.3 - 24.1cm | 40.6cm |
| Large | 24.1 - 27.9cm | 50.8cm |
| X Large | 27.9 - 32.4cm | 50.8cm |
How to use the Phase 2 Multi Podus Pressure Relief AFO
- Bend the knee and seat the foot firmly in the orthosis. Press with palm over the instep. Place the extra Kodel tongue piece on instep.
- Smoothly fold the anklet over the instep.
- Secure the middle strap first.
- Secure the calf strap.
- Secure the remaining anklet straps.
- Check clearance below the heel. Check that the sole of the foot makes contact with the orthosis. (If necessary repeat steps 1-4)
- Check the tightness by inserting one or two fingers under the strap Apply the Kodel cover around the adjustment bracket
Degree of angle adjustment
- Simultaneously, rotate adjustment dial of both positioning bars to increase or decrease angle of orthotics. Rotating the dial clockwise will decrease.
- Align angle of degree desired with end of plastic rod on adjustment bar. Each revolution of the adjustment dial increases or decreases the angle by one degree
Care instructions for the Phase 2 Multi Podus Pressure Relief AFO
- Wash periodically by hand with a damp cloth and mild soap
- Use a towel to absorb most of the dampness and then allow to dry at room temperature
- Do not hang up, or iron and do not expose to direct heat sources such as stoves, heaters, radiators, direct sunlight etc
- Do not expose to alcohol, ointments or solvents.
UK Delivery Information & Fees
This item is normally dispatched by Royal Mail. The delivery expectation of this service is 1 to 3 working days.
When ordering before 2.00pm (Monday to Friday), your item will usually be dispatched the same working day.
We offer free delivery on all orders of £40.00 and over. On orders below £40.00, a £3.95 delivery charge is applied.
| Order Value | Delivery Fee | Delivery Timescale |
| Up to £39.99 | £3.95 | 1 to 3 working days |
| £40.00 and over | FREE | 1 to 3 working days |
Please see our specific delivery information page for more information. For up to the minute delivery information, please call our customer care team on 020 7501 1102 who will be happy to help.
VAT Relief Information
This item is eligible for VAT relief depending on eligibility. To learn more about VAT relief, visit our VAT Relief Information page, or feel free to call us on 020 7501 1102 and we'll be happy to discuss your options.
Our Guide to Finding the Perfect Size and Fit
Using Your Shoe Size
For most of our insoles, the easiest way to find the best size for you is to go off of your current shoe size. The majority of our insoles are available in a range of sizes and you can simply select the size that best fits your existing shoes.
Please be aware that, as with shoes, there can be slight variations in the size of insoles. For example a size 8 of one brand might not be exactly the same size and width as the size 8 of another. To help account for these discrepancies, a number of our insoles include dimensions to help you ensure you're getting the right size.
Measuring Your Current Insoles
While using your shoe size to find your best size is a good guide, it is not always foolproof. If you want to guarantee that your insole fit your shoes as closely as possible, we recommend measuring your existing insole and using this as a guide to your size.
To do this, please follow the steps outlined below:
- Remove the existing insole from the shoes you wish to use your new insoles with (please note that not all insoles are removable)
- Measure the insoles at their longest and widest points (see the below diagram for an idea of where this will be
- Match the measurements to the dimensions of the insoles listed, and choose the size that best fits your results
.jpg)

Where Can I Find the Dimensions?
The dimensions for insoles can be found on the "Product Details" tab (please see below) and are usually found in the sizing section of the listing, in a table. Please be aware that not all products currently have the dimensions listed.

The dimensions of insoles can usually be found on the "Product Details" tab
What If There Are No Dimensions Listed?
If you do not see the dimensions listed on the Product Details tab, please fill in the form below and we will work to get the relevant information as quickly as possible. We will email you once we have the information that you have requested.
Trimming Your Insoles to Fit
To get the ultimate level of fit from your insoles, you can trim them to make a small adjustment. To trim your insoles, simply follow the steps below:
- Remove your existing insoles from your shoes
- Line up your existing and new insoles at the heel
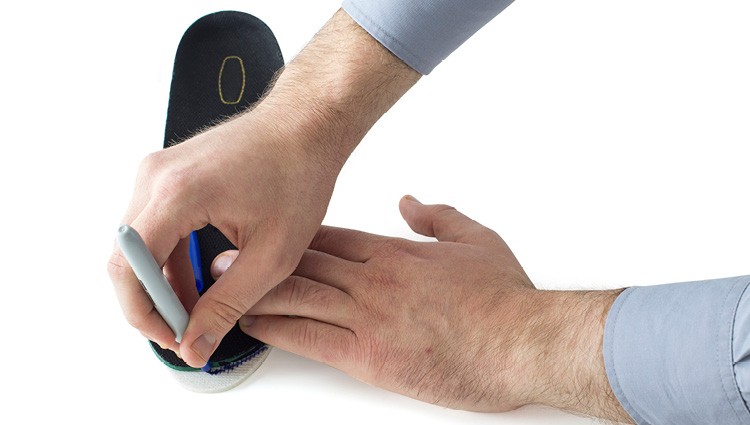
- Trace the outline of the insoles against the new pair at the toe end (see the image below for an example)
- Carefully cut along the traced line
- Your insoles should now fit your shoes better

Carefully trace the outline of your insole
Please note that not all insoles are suitable for trimming. Most insoles are unsuitable for return once they have been trimmed to fit; we recommend bearing this in mind prior to trimming.
If you would like a more detailed guide to trimming your insoles, please read our full guide on How to Trim Your Insoles.


.jpg)

